Sometimes we need a bedroom makeover but we just don’t have the money to go through an expensive renovation; Do what I did and use 2 colors of paint!
The photos here are actually from an old post from my old blog, but I figured that it’s still worth sharing because it’s the first big project I’ve ever done by myself.
Truth be told, I never got to finish this project because I got pregnant with my first child and had to move to our house in the countryside; I was very sensitive to the paint fumes -not to mention the pollution in the city.
I didn’t even get the chance to do the fun part: furnishing accessories! But I still hope you’ll enjoy the photos showing the transformation for our old master bedroom into a refreshing new one.
I was inspired to start this project after looking over at the House of Turquoise. Every photo in there looked so homey and refreshing. I thought to myself, ‘darnit, I wish my room looked like that.’. I needed a room makeover!
I’ve been giving the dingy wallpaper the stink eye for a while then, and since I’ve been itching to give our bedroom a makeover for a very long time, it didn’t take long before I started ripping it all off!
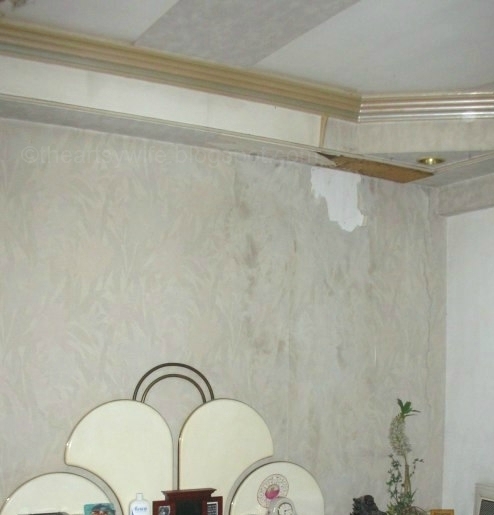
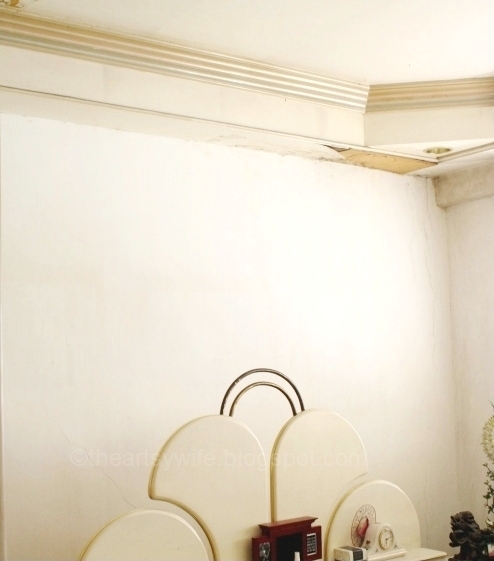
It felt like the walls were able to breathe again after I took off the century-old wallpaper.
At first, it felt like liberty, but then it quickly escalated into panic as I thought about the budget for a renovation.
I had nothing.
The only thing I could spend on was paint because that’s all the money I have in my stash jar. How was I to change the room with only paint?
I have got no clue as well, but I pushed on.
DIY ROOM MAKEOVER
Materials Needed:
Bucket of warm water
Old rags
Painter’s tape
Drop cloth
Painter’s googles
Nails
Hammer
spackling knife
spackling paste
Sandpaper
Paint
Paint Roller
Paint Roller Pan
Ladder
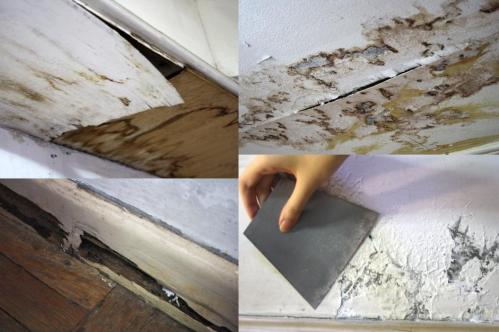
The walls and ceiling were in a bad state -with the past problems of water seepage and termite infestation; I had to work several weeks to prime them up for painting.
I was doing this entire master bedroom makeover by myself (while hubby was at work), and the humid, rainy weather was making it all the more difficult for me. At that time, I was literally waiting for paint to dry.
So here’s what I realized from the makeover:
- Ripping out the wallpaper is the easy part. To my horror, the contractor from 20 years ago used rubber cement on the ceiling instead of ordinary wallpaper glue, which means that it took me ages to clean out the goo that it left on the ceiling!
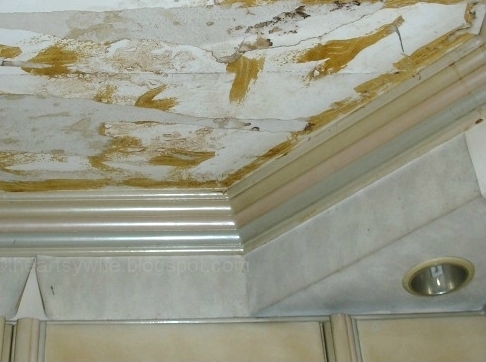
- I’m really good with a hammer. We didn’t really have the tools and equipment available at that time, so picture a tiny, skinny me, balancing on two chairs( I didn’t have a ladder either), trying to reach the ceiling that’s already peeling off, and pounding half-inch nails with a huge, heavy hammer. I felt sorry for myself as I was doing the damage repairs, but boy was I proud of my resolve.
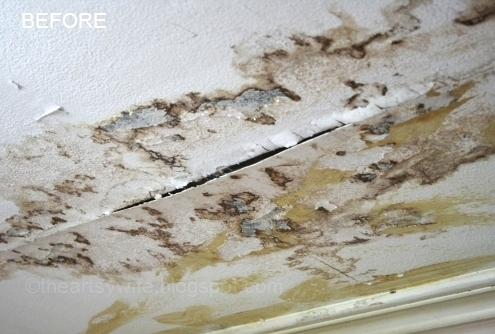
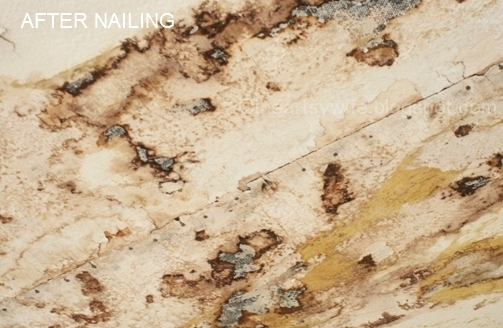
- Spackling is a skill; it takes practice. I didn’t know that the putty I used (the 2 kinds where you mix to form a spackling paste) to fill the cracks and holes on the walls, dries up so fast! In seconds! I only figured this out when I took about half a can of poly stuff (the putty) and mixed it with the ‘hardening’ glue as per instructions, and as I was mixing it with a plastic spoon, it hardened into a rock! I had something like a stone lollipop! It took a few small tries to figure out a technique to be able to apply the paste to the wall before it hardens. Turns out, it’s better if you mix little amounts (by spoonfuls) of only what you need, and work really, really fast to scrape it on the walls. Do not buy the kind with the two tubes that you have to mix together. Just don’t.
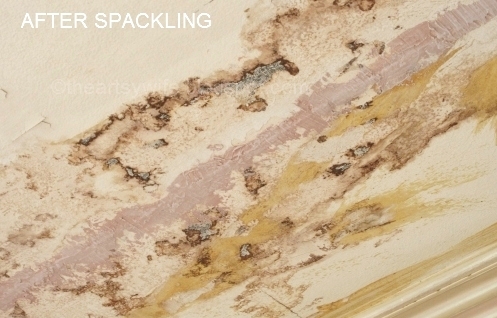
- Sanding is not my thing. My body was already aching with all the manly stuff that I’ve been doing, and I still had to clean and dust off everything (in preparation for the primer paint). If only I had a sanding machine -which shockingly, I did not- I wouldn’t have had to buff the wall for eternity. Honestly, I cheated. I barely sanded. I just crossed my fingers that the paint will do its job in covering the minor imperfections.
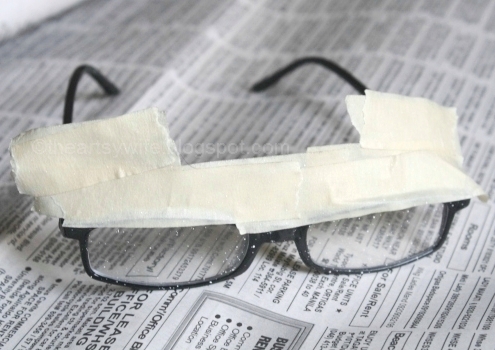
And just to show you how resourceful I am, here’s my makeshift “goggles” to prevent paint from splattering into my eyes.
Yep, that’s masking tape.
I intentionally left the middle part like that because my bulging forehead already sort of protects that part of my face. (Don’t be like me and buy painter’s goggles!)
I think I just need a light saber to complete the look.
I really was an idiot for underestimating the work involved when I decided to do the room makeover project on my own.
I can’t tell you how sore I was after the room makeover!
Moving forth, this was how our bedroom looked like before I went ballistic:
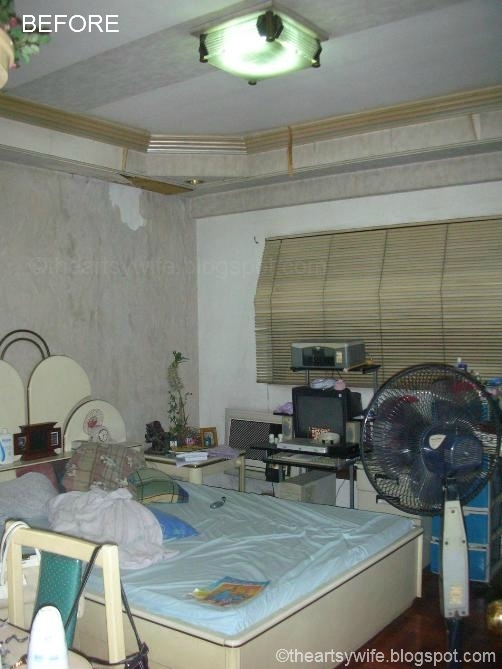
Here’s what it looked like after:
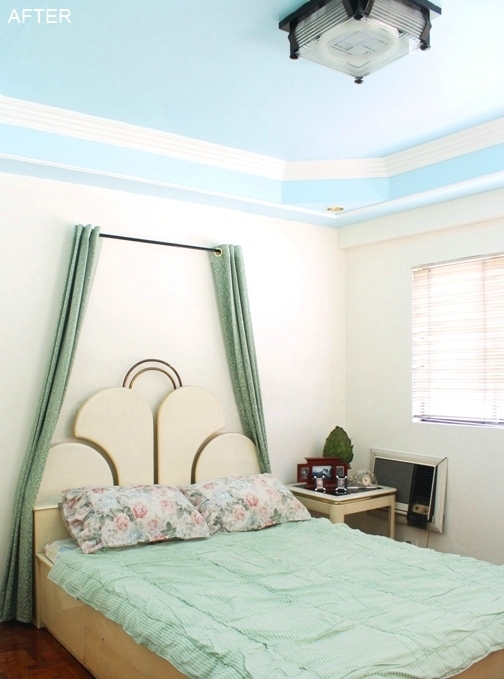
I could only afford this blue paint, remember? Everything else, I took from the other rooms in the house that didn’t need them.
It was difficult getting a consistent look when you only have your mom’s hand-me-downs. I only worked with color to sort of hold everything together.
This room gets very warm during the day, and my goal was to cool it down and make it a refreshing oasis.
I think I did ok; I was able to change the look of the room for the better considering that I didn’t have much to work with.
What do you think of my room makeover?


