Buying a plant at a clearance rack is exciting and rewarding. The catch is, most of the plants that are on sale are neglected, sickly, and have incorrect labels or none at all. Some healthy-looking plants might be annuals that may be at the end of their season and would likely die not long after taking it home.
So, how should you evaluate which plants are worth rescuing from those that are too sickly to recover? I’ll let you in on the things I’ve learned on how to score great deals on plants and what to expect at a clearance rack.
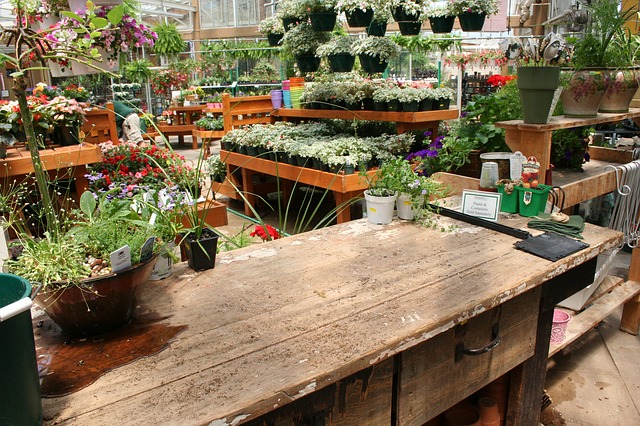
What Plants are put into Clearance Racks?
Clearance Racks for reject plants are not a secret. This means that you won’t have a buffet of greenery waiting for you unless you seek them out early.
In an ideal world, all gardeners will be leaving some good picks for the others to purchase, but in reality, this isn’t the case. A lot of veteran gardeners will be on the lookout for the best contenders, and they’re more likely to snuff out all the good ones if you don’t beat them to it.
Typically, scouring the clearance rack is a great way to find a variety of plants that you normally wouldn’t buy at their full price. The most common plants that are cleared out will be made up of root-bound and distressed plants in a sort of end-of-season sale, but it isn’t so common to find a surplus of healthy or overgrown plants.
Clearance racks also tend to be the place where garden centers and nurseries will take their neglected plants and unwanted inventory. If they don’t sell the plants fast enough, it’ll only take up space and cost them more money to keep the plants alive. It would be more sensible to offload them — at least at a break-even profit.
Most often, garden centers will like to stay up to date with the latest gardening trends, and those who want to buy brand new plants will want to do the same.
That means the old inventory–even those that are flowerless albeit healthy plants–will be pushed to the back like hidden gems left for you to find at these gem clearance carts or racks, and you could be the one to get it for a much better price than you ever would have found at the garden center. How exciting is that?!
There are different types of plants that you might see at a clearance rack that could be varying in condition.
Whether you want to take a chance on one of the plants that need extensive care or just one of the plants that need transplanting is up to you, but it does leave you with plenty of options once you’re ready to shop the clearance racks.
Where do you find clearance plants?
Call the store or your nursery and ask ahead of time. Ask if they have a plant clearance rack, and if they do, when they usually have them and the best time to come and shop. You can also find out what particular type of plants they are clearing out, and whether they have perennials more than annuals.
What to look for
Not all stores will have a dedicated clearance rack for marked-down plants. If this is the case with your local nursery, look for plants with special stickers or signs.
I’ve made the mistake of only checking out the clearance racks when there were actually more clearance plants left in their original display area because there were too many plants to fit in the clearance racks.
The staff might also have some plants hiding behind racks and shelves waiting their turn to be displayed as the ones at the front sells out. Sometimes, if you’re lucky, you’ll find a pile of rejects near the dumpster at the backend of the store and they’ll give it to you for free if you ask.
Do a bit of investigation
When you visit, take note of the days when the clearance rack is full of unwanted inventory. Check them at different times too as they may place new offerings as soon as the cart or rack is almost empty. You’ll soon become familiar with how long they would hold on to the plants before they are given the boot.
In my case, I noticed that my local plant outlet usually loads the clearance racks at night before closing time so they’re ready to sell for the following day. I came to realize this by dropping by the store at different times of the day and at different days of the week. I noticed a pattern of when the clearance racks seem to be full of ‘new’ plants. So now I often do my bargain hunting just an hour or two before closing time.
As a side note, you can also run into some clearance plants at your average grocery outlet as well, so don’t forget to check if they have it when you do your usual grocery rounds.
Time your shopping and Check Out Your Clearance Plant Options
The easiest way to ensure a great bargain is to arrive early and inspect all of your plant options so you won’t end up getting the worst of the worst.
You’ll need to know when their clearance starts so you can immediately take the first pick and bring them home. They also have a better chance of recovering if you’re able to do early interventions.
Do Your Research on the Different Plants Available
The first time I bought things from the clearance rack, I just picked out random things not knowing what they were and how they were going to thrive in my garden. I have learned a few things from my mistakes so even if it seems tedious, you need to prepare yourself to get the best deal out of it.
Be warned however, that the more you hesitate and take time to think about it, the more chances you’ll lose on the good plants.
Things to do when buying clearance plants:
Have a wish list. If you can have an early visit, you can check out your options and make a list of the plants you’ve taken an interest in, leave the store and return the next day armed with more information on the things you’d surely put in your cart.
Create a list of what plants you’ll need or aim to buy and which ones are a priority. There will probably be a lot of shoppers there too so you should immediately grab the ones on top of your list.
Set a Budget. Another thing to keep in mind when your shopping is to set a maximum amount you would pay for a particular plant. While most clearance plants are only a few dollars or even a few cents each, these can add up when you go overboard with your shopping. So don’t be afraid to set a limit to what you can spend for that particular spree.
A good way to set a reasonable budget for yourself is by setting it close to the average price range in the market, as you would have done in your research on plant options prior to shopping day.
Identify your plants. Have a plant identifier app installed on your phone. You will get overwhelmed with the options, and you will likely encounter some plants that you don’t know anything about. I suggest that you download a plant identifier app so you can instantly check the plant that you’re looking at and have a summary of the care it needs.
Know the plants’ value. Check out the value of the plant in gardening sites and their average prices to get an idea of what a fair price looks like for that particular plant. It should considerably be lower, but some plants are just still a bit costly for the value you’re getting. You have to remember that these are damaged plants after all and you shouldn’t have to pay more than you have to.
Choose plants within your skill level. If the plant is known to be easy to care for, then it’s probably worth the risk to purchase. If it’s something difficult to grow, put it off until you become more experienced.
Consider the Plant’s Recovery Success Rate. If you think that the price is still a bit high for the low success rate of a plant dying on you when you purchase it, just put it back in the rack. I know it can be hard, especially if it’s a plant that’s been on your wish list.
Things to avoid when buying clearance plants:
Don’t buy too late in the season. Even hardy plants will not survive if they don’t have enough time to acclimatize before frost sets in or the temperature go up. For instance, I bought bulbs on sale because it was already past its sowing period, I still got them and planted them anyway. I ended up with tulips that had too short stems, and some haven’t flowered at all.
Don’t have unrealistic expectations. Don’t buy a struggling plant and count on its immediate recovery after giving it a bit of water. Encouraging fresh growth by pruning and giving the correct amount of sunlight and water. Do as best as you can and everything else is a bonus.
Don’t buy if you can’t commit. Try to be realistic about whether you’re ready to commit to caring for your new plant at short notice. My sister-in-law once bought 2 blueberry seedlings and hadn’t had the time to replant them until they dried up into twigs.
Don’t feel pressured to buy. It is rare, but I know how sulky I become when I walk away from the garden center empty-handed, but it’s easier than making the effort to take all these plants home that may or may not survive or bring pestilence to the rest of my garden.
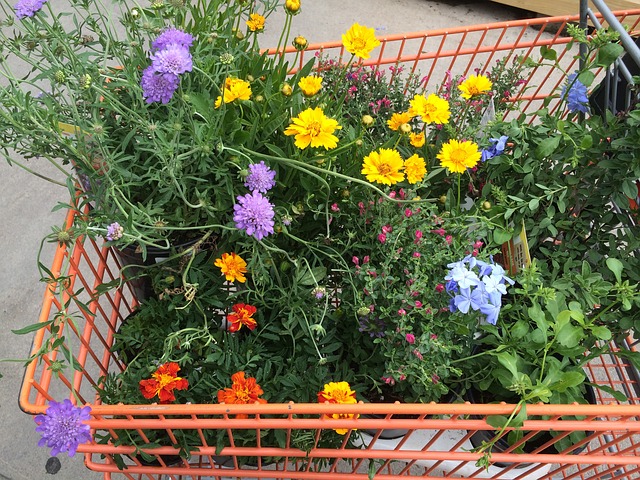
For the Fun Part: Shopping Time!
Before you go into a plant shopping spree mode, you have to know beforehand which plants are worth the rescue and which ones are destined for compost.
It’s tempting to buy every cheap plant you can fit in your cart, especially when a lot of them are hardy, flowering perennials, but please don’t be afraid to refrain from buying plants for the following reasons:
What to avoid when buying clearance plants
Disease or Pest. Some of these plants may have diseases or insect infestations that may get infect your home and garden. Give the pot a slight shake and see if any insects fly away or drop out. Check under the leaves and stems for signs of insect activity and refuse anything that has unusual droppings or colorings on any part of the plant or its soil.
Wilted or Burnt plants. Since clearance plants are otherwise known as rejects, it will have some sort of undesirable qualities. But when the plant is neglected to such a terrible extent, it may already have a compromised system and may not survive even with proper intervention.
Compromised leaves. Be wary of leaf spots, brown or yellowed leaves, plants that have any barely left. Leaf spots can be a sign of mishandled or diseased plants.
Plants with few brown or yellowing leaves may be okay, but if the number of discolored leaves or leaf loss is significant, it’s a sign that the plant is considerably stressed from neglect and might not survive. Some plants, however, naturally behave this way if they enter into their dormancy period, so check with the plant type as well.
Flimsy or leggy stems. Leggy stems are a sign of inadequate light. When a plant desperately tries to reach light for nourishment, the stems grow thin and are usually unhealthy.
Give the plant a little shake to see if the stems are stand firm. It shouldn’t feel like it’s wobbling out of its container or about to tip over because it’ll be a sign that the root system hasn’t developed well. Give the stems a bit of a pinch, paying attention nearest the soil, and check that it doesn’t feel soft or mushy.
Unhealthy Roots. Root-bound plants need a bit more care when planting. Most clearance plants already have roots coming out of the drainage holes, but as long as the roots look healthy, the plant should be okay with some good pruning. Slightly wiggle your fingers into the roots and see if they move and feel like they’ll loosen up easily.
If you can, take the plant out of the pot to check the root situation. Roots come in all shapes, sizes, and colors. They should always feel firm and not dry, discolored, moldy, or squishy. If they are squishy, it’s a sign of root rot and will give off a rotten smell.
When the Clearance Plants Arrive Home
Remember that most clearance plants will have stunted growth or some sort of damage due to neglect, lack of nutrients, and the small-sized pots that they live in whilst they’re on display. While they’re not really given the option to grow to their fullest potential this year, they should be just fine next spring if you give them the proper care soon afterward.
After scoring the clearance plants that you want, get them in the ground as soon as possible so they can start their recovery process.
The usual planting rules will apply, but consider the current condition of your plants and make the necessary adjustments in planting them with the least amount of additional stress and damage.
STEP ONE:
Have your new container and soil prepared with compost and other necessary amendments already mixed in. You may treat the soil with a natural pesticide, but avoid putting fertilizer in the beginning. The last thing a distressed plant need is excess nutrients that would take too much of its energy to absorb. The plant should first focus on repairing itself before growing.
STEP TWO:
With the plants still in their original pots, remove any dead, wilting, burnt, or yellow leaves. Deadhead or cut away any spent blooms. If the branches or stems are leggy and overgrown, cut it back hard about a third of its height, so it can focus its energy on growing new roots and stems.
If the plant seems to be over-watered, let the soil dry out first before proceeding. Water in well, avoiding the blooms or leaves to prevent rot.
STEP THREE:
Take the plant out of the pot. If it doesn’t slide right out, slightly squeeze the sides and tap the bottom of the pot. For larger plants, you can roll the pot on its side while gently pressing the sides down with your weight.
STEP FOUR:
Overgrown plants Will likely have pot-bound roots. You will need to prune them so that the roots will grow outwards instead of growing back into themselves. You may cut the bottom of the roots if it’s too tightly balled up with a pair of scissors and spread it outwards.
STEP FIVE:
Place the plant in the new container, center, and upright. Ensure that you’ve already put a base layer of the amended soil so that the roots have new space to grow into, and then top it up just up to the level of its original pot. Don’t bury the stem any deeper than it originally is in its previous container to prevent rotting.
STEP SIX:
To settle the new soil, water in well again, soaking the soil around the plant until excess water drains out the bottom.
Over the next few weeks:
Give it a few days and allow the plant to get adjust to its new home. Observe for any signs of new growth, like young leaves or flower buds. Depending on the type of plant that you’re trying to revive, continue to provide the correct amount of sunlight and water, and mulch during winter. Reevaluate and adjust the care as you consider the changes in its progress to recovery.
When should you buy clearance plants?
A lot of home improvement stores and nurseries have a clearance rack that’s dedicated to selling out their unwanted plants all throughout the year.
However, most gardeners find that the best time to look for clearance sales is during the fall season, around September and onwards. This is a time when most stores clear out their inventory from the previous season to make space for new inventory for the new season and holiday season.
A lot of the clearance plants will be trees, shrubs, bulbs, and perennials. There will also be some annuals for sale, but I don’t usually go for them as they usually are at the end of their season and will likely die as soon as I get them home. But everything else is worth a try, especially if you get them in the ground as soon as possible so they can develop roots before the frost sets in.
Enjoy the experience!
Honestly, I go to the garden center whenever I can because I feel relaxed while I’m browsing all the plants that are on display. It doesn’t matter whether or not I’m able to take home anything, but purely for the satisfaction of being surrounded by serene greenery.
In this video, I’ll take you on a day I went bargain hunting for clearance plants.
Hunting for great bargains in clearance racks is just a bonus for me whenever I go plant shopping. And because the plants cost considerably less, I take more chances because I know I can still learn from it should I fail to revive something.
There will always be unwanted plants waiting to be sold, and if you lose on some nice ones, you can wait for the end of the season again for a new stock of clearance plants. No matter what, remember the fun of the hunt!
